
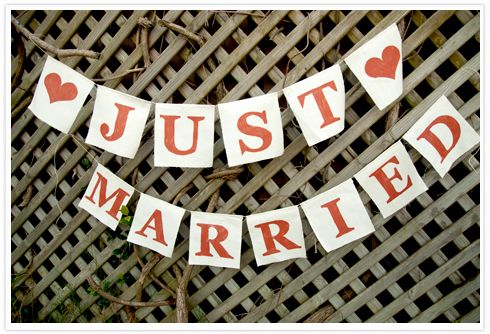
DIY Just Married Banner
Tuesday, February 14, 2012
I know you've seen this a lot around the internet but owell, there's no harm posting another one. I just started our DIYs for the wedding so I thought I'd share it with all of you too! It's amazing how a project like this can add so much character to the simplest detail!
So without further adieu, here's what you'll be needing:
- 2 yards cotton cloth
- acrylic paint
- sponge brush
- cutter/scissors
- stencils
- ruler
- glue gun & glue sticks
- twine string
First step is to cut your cloth into 7x8 for each letter, set that aside while you create your stencil. I printed my stencil using the FFF Tusj font (c/o dafont.com) with font size 500 and then simply cut out the letters with a cutter.

Now that you have you're stencils, it's time for painting. My favorite part! What I did is to have an allowance of 2 inches from the top so you have space for the twine. And good thing about acrylic paint, you don't have to worry about it drying because it dries almost instantly!
Last but not the least, glue gun the twine string to the back of each letter (or sew it if you want). That's it! You're very own Just Married banner ready to hang!
Till the next post, girls!


0 comments